


RP-8000
SETUP
Connections
Normally the RP-8000 will be used as a Digital Vinyl System (DVS) also known as Timecode mode. Up to 4 x RP-8000 units may be linked (chained) as per the following diagrams. Connect one RP-8000 with a USB port of your computer and use the provided USB/link cables to connect any additional unit as Slave units.
Use the provided RCA (or any standard RCA) cables to connect each RP-8000 with the Line/Phono Inputs of your DVS Ready Audio Interface or Mixer.
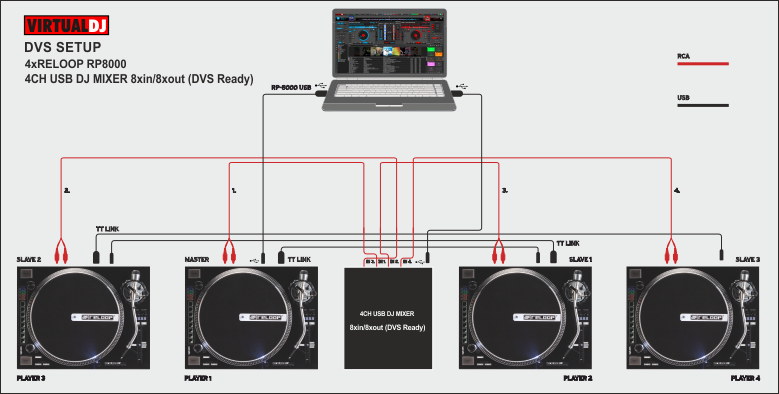
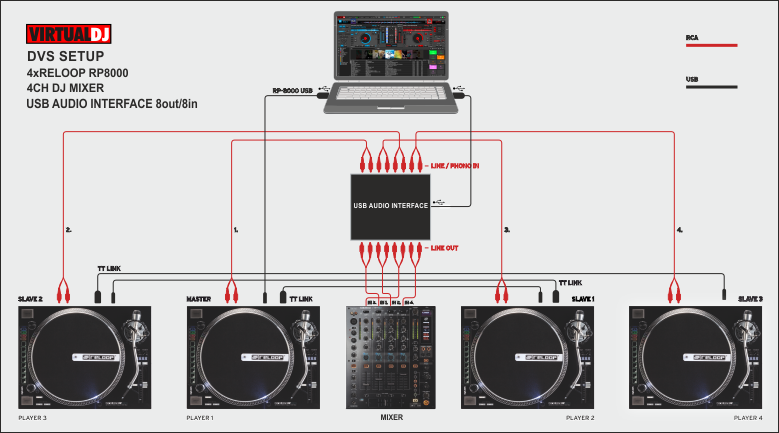
For each timecode Input (RP-8000) a stereo input and a stereo output channel is required. E.g. for a 2xRP-8000 setup a USB Audio Interface 4out/4in or a USB 2-channel mixer 4out/4in is required at least.
Connect the RP-8000 units to AC using the provided cables and power on from the top On/Off switchers.
Firmware & Drivers
Firmware: Update the firmware of each unit to the latest version. Note that some of the features mentioned in this guide may not be available with outdated firmware. http://www.reloop.com/reloop-rp-8000
Drivers: No driver software is required for the Reloop RP-8000 to be installed. The device is USB class compliant and your Operating System will auto-install the necessary driver when connected via USB cable or linked as Slave unit.
VirtualDJ Setup
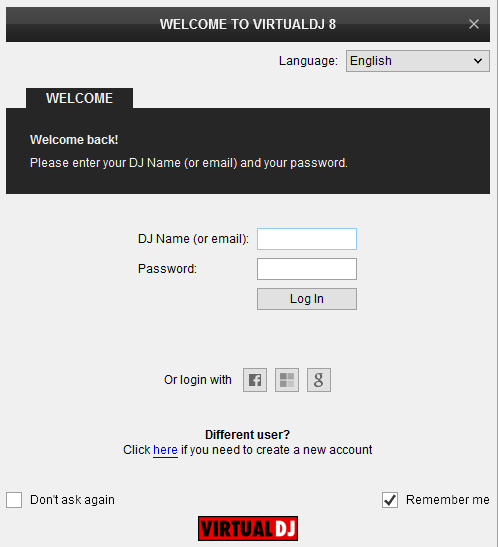
Once VirtualDJ 8 is launched, a Login Window will appear. Login with your virtualdj.com account.
A Pro Infinity or a Pro Subscription License is required to use the Reloop RP-8000 as MIDI controller.
Without any of the above Licenses, the controller will operate for 10 minutes each time you restart VirtualDJ.
https://virtualdj.com/buy/
Click to OK.
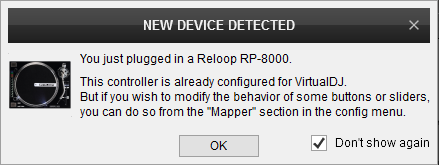
Unit is now to ready to operate with VirtualDJ.
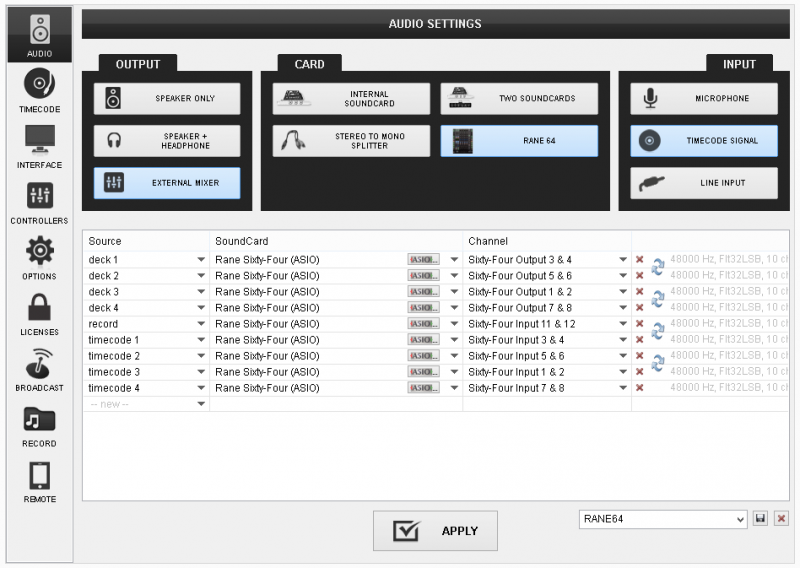
Audio Setup
By default VirtualDJ 8 will send the Master Output to the built-in (default) sound card of your computer.
The right-sided image is showing the pre-defined audio configuration when a Rane 64 mixer is used (DVS-ready).
MIDI Operation
Note that each unit is assigned to Decks 1,2,3,4 by default. See Software Controls on how to assign each RP8000 to control a specific VirtualDJ Deck
Find more details at
https://virtualdj.com/wiki/VDJ8script.html

For further software settings please refer to the User Guides of VirtualDJ 8.
https://virtualdj.com/manuals/virtualdj.html
Layout